License : Creative Commons Attribution 4.0 International (CC BY-NC-SA 4.0)
Copyright :
Jeremy Fix,
CentraleSupelec
Last modified : April 28, 2024 02:04
Link to the source : index.md

dcejs is a javascript desktop software allowing to easily allocate a node on the Data Center d’Enseignement (DCE) on the CentraleSupélec Metz campus.
Installation
We need you to have ssh-keygen installed on your system. On Linux or MacOS, this should be already available. On Windows, you may need to activate the OpenSSH extension.
On all the OS, you can check this works by ensuring you can execute the command ssh-keygen from a terminal (or command line tool).
If you want to use VNC, you should also install the tigerVNC client.
If you want to use NoMachine, you should also install the NoMachine client
To install the app for your OS, please select the appropriate runnable from the releases on the Release page.
On Windows, you may need to “unlock the application” (in the properties of the exe file) to allow its execution.
On MacOS, you also need to enforce MacOS to open the app even if it claims that the “developer cannot be verified”. This can be done by Ctrl clicking on the app for launching it.
Connecting to the clusters
Once your application is installed, you can select the cluster (either CPU or GPU) on which to connect and connect to it.

At the very first connection, the application will ask you for a passphrase. This is a passphrase for a key that the application will generate and use for the next connections. Once the passphrase is given, the application will ask you for your password for posting the key to the server. This password is the one you have been given with your login.

The next times you will connect to the cluster, you will only be asked for your passphrase.
Allocating a node
Once connected, you can allocate a node. If your labwork is planed, you should have receive a reservation name and you will use it to allocate a node. If your usage of the cluster is not planed, you may be able to allocate a node without a reservation.
With a reservation
To allocate a node with a reservation name, assuming your are connected to the cluster, you click on the “New” button in the “List of your allocations” section.
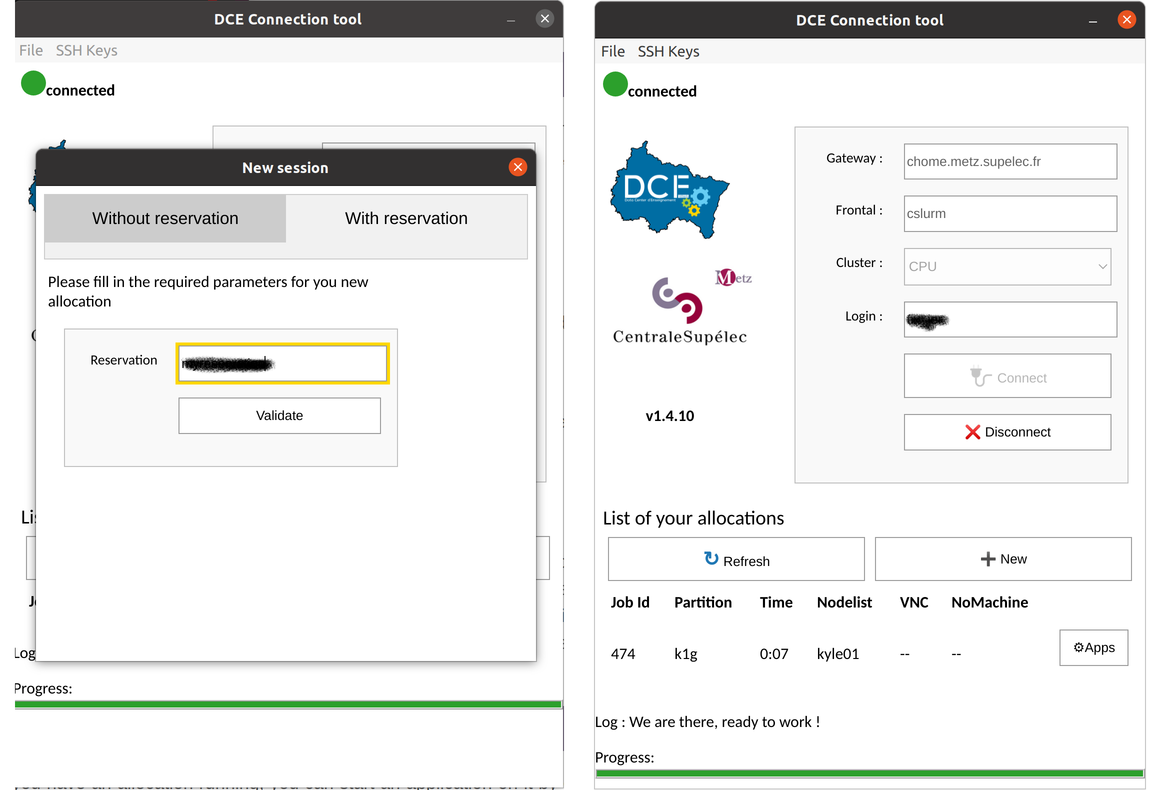
Then you need to select the tab “With a reservation”, give the reservation name, and validate. The application will trigger the allocation and you should see a new entry in the “List of your allocations” section. You may need to trigger the “Refresh” button.
Without a reservation
If you do not have a reservation name, you must click on the tab “Without a reservation”. Then you will have to provide a partition and a walltime. A partition specifies a list of nodes, possibly the available applications, and a maximum amount of time. For the available applications, note that if you want to use NoMachine, you must selection a partition name which ends with a “g”, otherwise NoMachine will not be available. The walltime must be smaller than the maxtime of the selected partition.
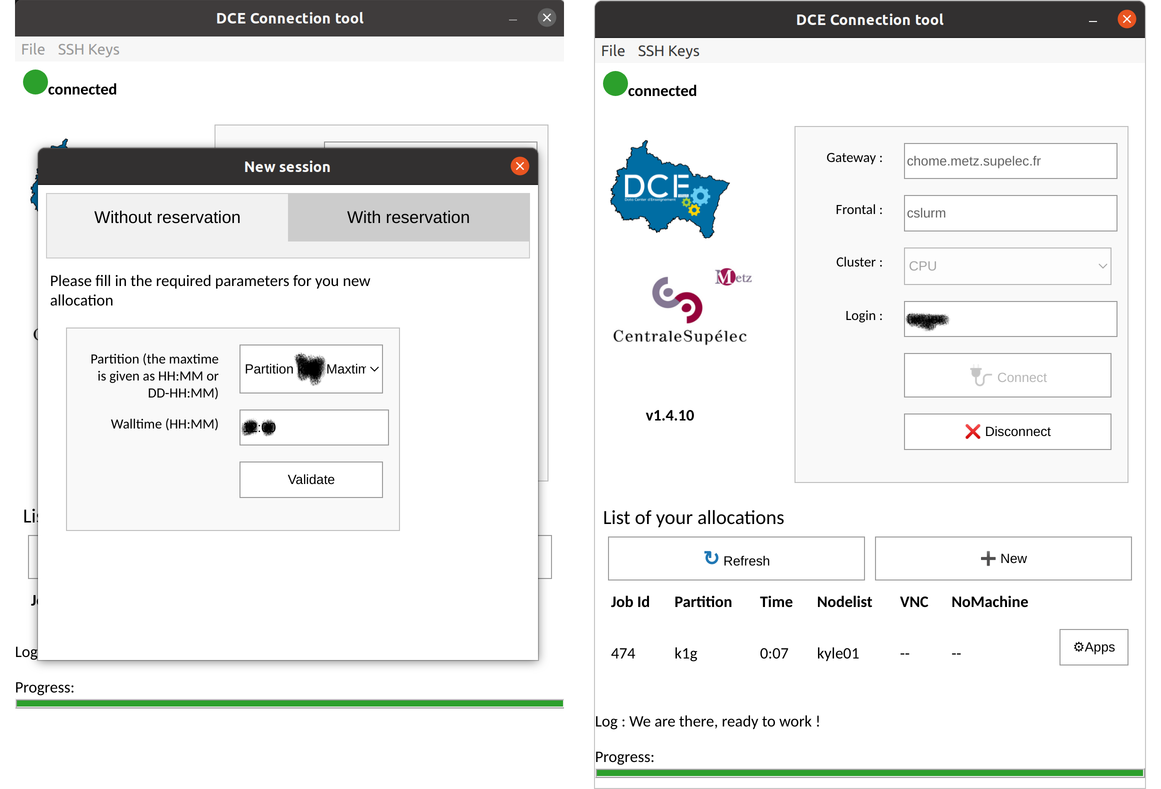
The application will trigger the allocation and you should see a new entry in the “List of your allocations” section. You may need to trigger the “Refresh” button.
Running an application
Once you have an allocation running, you can start an application on it by clicking on the “Apps” button along your reservation in the list.
Among the applications, you can start VNC, NoMachine and possibly others.
Running and connecting to NoMachine
If you started NoMachine (see the figure below) and if that was successful, you must see a string like “localhost:4000”, or “localhost:4001” or … along the line of your allocation.
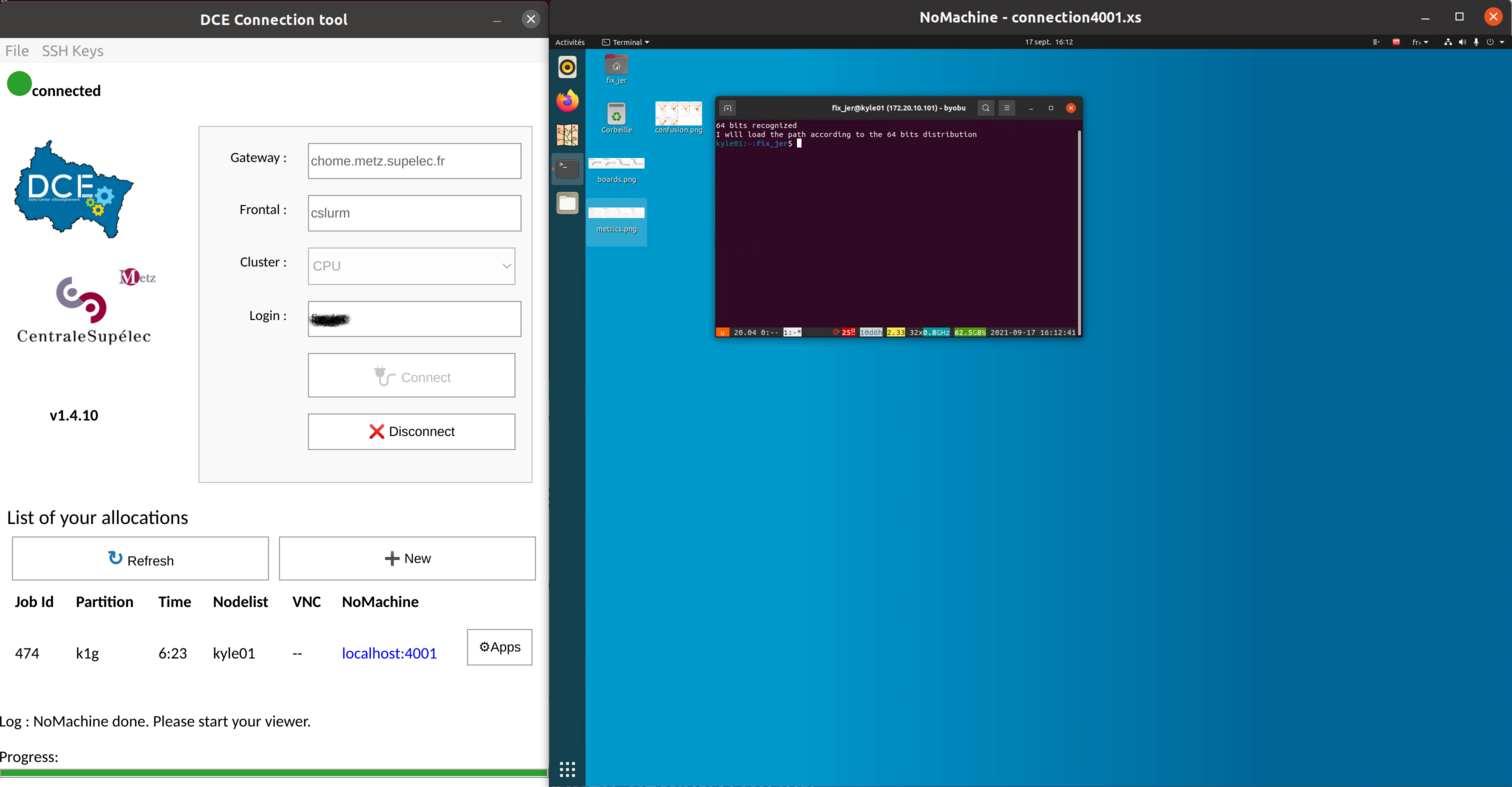
Then, if you are running the application on linux or MacOS, by simply clicking on this blue link, the NoMachine client should be opening. If you are running on Windows, you must start NoMachine manually, create a new connection by specifying the hostname localhost and the port listed on the dcejs application (either 4000 or 4001 or 4002, …) and then connect.
During the NoMachine connection, you will be asked for a login and a password, these are the ones you have been given to access our clusters.
Runnning and connecting to TigerVNC
If you started VNC (see the figure below) and if that was successful, you must see a string like “localhost:5900”, or “localhost:5901” or … along the line of your allocation.
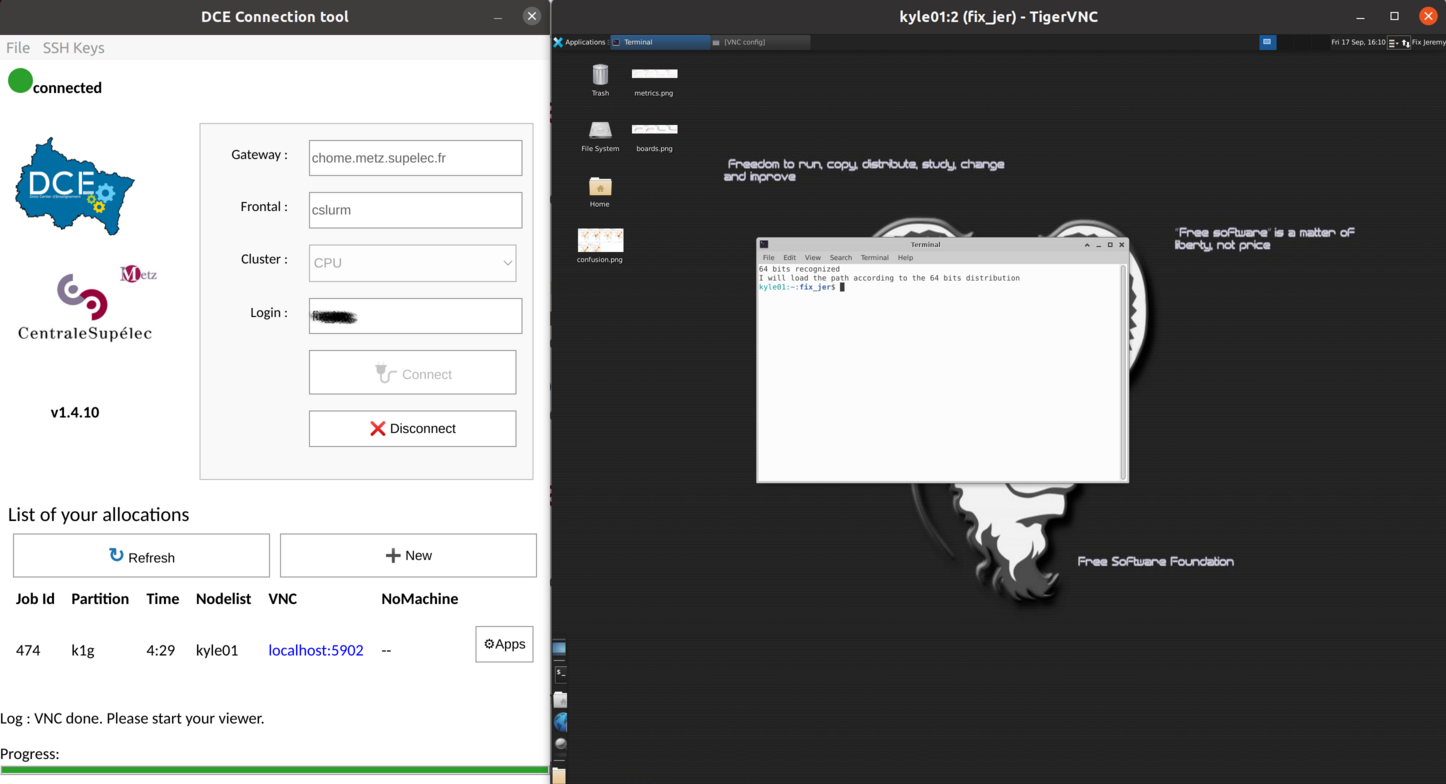
If you are Linux or MacOS, just clicking on the blue link will start the tigervnc viewer. If you are on windows, you need to start manually the tigervnc viewer and copy/paste the url localhost:5900 or localhost:5901, or… in the connection link.