License : Creative Commons Attribution 4.0 International (CC BY-NC-SA 4.0)
Copyright :
Herve Frezza-Buet,
CentraleSupelec
Last modified : April 27, 2024 02:04
Link to the source : index.md
Remote desktop with VNC
VNC is a software that allows you to get access to a remote graphical desktop hosted on quite powerful machines we have at school.
Preliminary settings (to be done once)
Client installation
On your laptop, you need to have a VNC client in order to display the remote desktop.
We recommend the tiger vnc client (vncviewer), for compatibility with the tiger vnc server installed on the clusters.
On ubuntu, you can get it by
mylogin@mymachine:~$ sudo apt install tigervnc-viewer
And then it can be started with the following command
mylogin@mymachine:~$ vncviewer
You can also install tiger vncviewer on MacOS and Windows.
Server installation
On your cluster account, put the script xstartup in the ~/.vnc/ folder. This scripts customizes the remote desktop that will be started by vnc. If you do not know how to copy files on your cluster account, see the section on How to use your account. For example, the following command line, executed from the cluster, will do the job :
mylogin@clustermachine:~$ wget https://tutos.metz.centralesupelec.fr/TPs/VNC/data/xstartup -P ~/.vnc/
Where you accessed clustermachine by either using the cscluster script or depending on whether you have a CPU or GPU account, you can also ssh either on chome.metz.supelec.fr or ghome.metz.supelec.fr.
Here, we suppose that VNC server tools are installed by the cluster administrators… so that’s it !
Start a VNC server on the remote machine
Once you are logged on a remote machine (usually a machine allocated to you on the cluster), you have to start a vnc server on that machine.
Several vnc servers can run on the same machine, they each listen on a port like 5901, 5902, 5903, … since you may arrive on a machine where a vnc server is already running for another user.
So first, (and when you feel you need it), it can be useful to have a list of running vnc servers.
mylogin@mymachine:~$ vncserver -list
If any, current running server are displayed, each is associated with a number like :1, :2, …
In order to kill a server ( you will have to kill yours when you are done), this number is useful. For example, you can kill vnc server :3 with the command
mylogin@mymachine:~$ vncserver -kill :3
Ok, now let us start a server for our own purpose.
mylogin@mymachine:~$ vncserver -SecurityTypes None -depth 32 -geometry 1680x1050 -cleanstale
You will get the :n number for it (e.g. :3). It means that this server is listening on port 5900+n (e.g. 5903).
This port number is the one you will have to provide to clients, and you may need to do a port forwarding of this port for that. See next section.
Start a VNC client on your personal computer.
Make a ssh tunnel to the server
Before running the vnclient, you need to be able to contact, through the network, the remote machine on which the vnc server is running. If such a machine belongs to our clusters, you cannot access it directly without bouncing over several gateways. Hopefully, you can ease that connection by setting up a ssh tunnnel.
This can be done by the cscluster script if you want to connect on a machine you have allocated on the cluster. In a specific terminal on your personal computer, run something like
mylogin@mymachine:~$ cscluster port_forward -c *** -p 59** -u *** -j ***
If your server listens port 5903, use -p 5903 in the above command.
The above command relies on the job id, since we use -j ***.
If you need to connect to the VNC server launched by a teammate, you cannot rely on the jobid. Rather, ask the other users to tell you which machine they use (they can type hostname in a terminal to tell you), and mention the machine in the port forwarding command rather than the job id. This is the -m *** flag (e.g -m sar03 on cluster sarah) instead of the -j ***. For the login, you still use your own cluster account (not necessarily the one of your teammate).
mylogin@mymachine:~$ cscluster port_forward -c *** -p 59** -u *** -m ***
Launch the viewer
Now we assume that the remote vnc server can be contacted on a port on your localhost, having set the appropriate ssh tunnel as described in the previous section.
For starting the vncviewer, simply start the command below:
mylogin@mymachine:~$ vncviewer
And you will get this screen
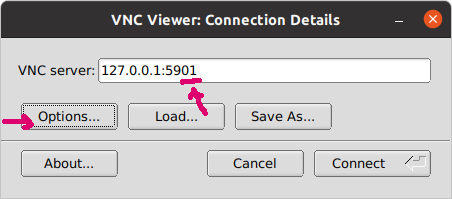
Since you have a ssh tunnel, you tell the client to log on your machine itself, i.e. 127.0.0.1, with the appropriated port number. The port number may have to be adapted depending on which screen the vnc server was started (5901, 5902, 5903, …).
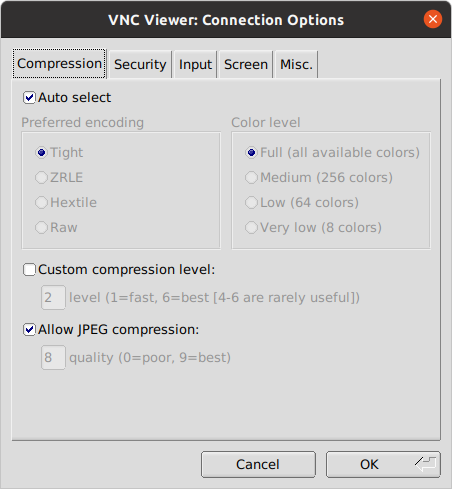
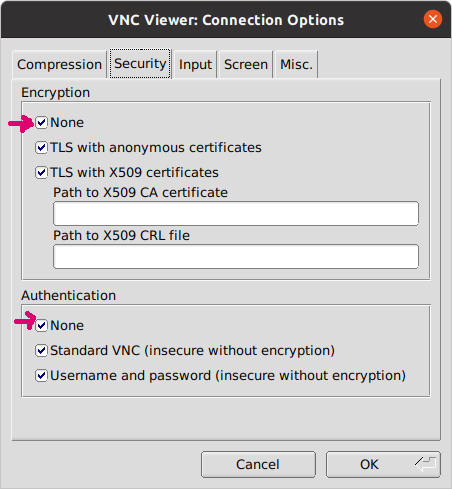
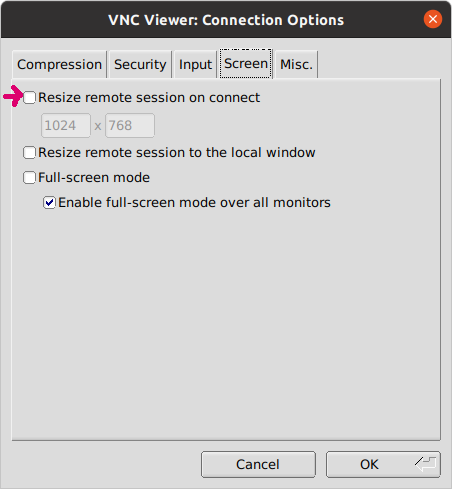
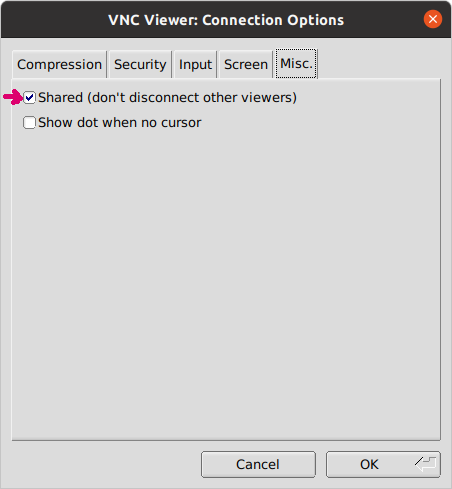
Then, check the options (see hereafter) and click the “connect” button.
You have to be careful with the options. Check this at first run.